Malted and milled grains, hops, yeast. Three of the four ingredient for great beer.
I've brewed a porter and it turned out amazing. Not my words, but those who have tasted it have given it their thumbs up. I've brewed a brown ale and while it's still maturing the first bottle was promising. Being late autumn I want to have a stout for the colder weather, and so I combed my two books, poked around online, collected recipes and as I've done for my past two batches I used my brewing knowledge to come up with a recipe I can call my own. Additionally, I'm ever-incorporating new techniques and technologies into my brewing to get the best beer my kitchen can produce and some birthday gifts came in handy this time in attempting a more precise mash.
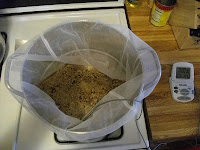
Using my new digital thermometer with remote probe, temperature alarm, and timer to monitor the mash.
My labmate Kati told me about oven mashing, which I wrote about in the Brown Ale post. I attempted doing that for that brew, but without the remote probe thermometer I wasn't able to monitor the mash while it was in the oven, and ended up taking it out and putting it back in the oven, adding cold water and putting it on heat throughout the mash process. This time, however, I had a brand new digital thermometer with remote probe, thanks to mom and dad and my recent birthday. Overall it went very well, but I had forgotten to take the milled grains out of the fridge before brewing, so when I introduced the grains to the strike water the temperature dropped far lower than is expected so the first 10 minutes of the mash was spent bringing the grain+water up to 153°F. Because of that, I steeped the grains for 70 minutes instead of the usual 60 and got a wonderfully sugary first running.
First runnings from the mash.
First (left) and second (right) runnings after steeping the grains in 170°F sparge water.
The boil went well, and the only thing to note from it is the large hop addition for this batch. The recipes I culled and combined called for 20 gm Target hops with 9.5 AA% at the start of the boil. Stouts are traditionally bitter with little to no hop aroma and flavor, so this is a good amount of hops with high enough alpha acids for the desired bitterness. However, I learned upon trying to buy Target hops at The Brew Mentor that that variety is somewhat specialty and they don't carry it. Don, the same Brew Mentor employee who helped me put together the Pumpkin Porter recipe, suggested substituting Willamette or Fuggle hops for the Target, with appropriate amount adjustment for AA% values. The two alternate hops had AA% around 4.8, so I would have to use more hops than was called for in the original recipe. I opted to buy and use both, knowing I would have to calculate how much more of each hop to add and decided to roll the dice with how the combined hops would affect the final product.
Beautiful heat break signaling start of boil.
That's where such websites came in handy: Hop Substitution Chart and Hop Substitution Guide and Calculator. If I didn't have the expertise of The Brew Mentor employees, charts like the first link are incredibly helpful. The second website uses a drop-down that does the same thing, but also compares results from several sources. What makes the second link additionally helpful is the substitution calculator. The explanation below the calculator shows that the actual calculation is no harder than anything you did when learning about ratios, but this takes away that one math step and ensures no algebra errors along the way. If I used just one of either the Willamette of Fuggle hops I would have to use 40ish grams, but since I was using both and they had similar AA%, I used 20 grams of each.
Tons of hops to throw into the boil.
There goes the Willamette. And there goes the Fuggle.
Aside from the doubling of hops, the boil went well without anything noteworthy occurring. I let it boil for 15 minutes before I added the hops, then started a 60-min timer for the rest of the boil. I've been doing that with my batches, allowing it to boil for some time before adding the first hops and starting a timer, because I like to let the proteins coagulate more and want to concentrate the sugars more. This may have contributed to the possibly imperial nature of this homebrew batch.
Hydrated yeast ready to be pitched into chilled wort.
During the wort boil I boiled a small amount of water to hydrate the yeast. That went well and the yeast was ready to pitch when the wort was chilled and ready to go into the fermenter. However, chilling the wort didn't go as well as it normally does. Instead of using 22 lbs of ice to create a cold bath in my sink, I found that I can use just 7 lbs to create an appropriate cold bath in my Cube Cooler. This has worked well the previous two batches, but during this brewing I closed the lid of the cooler (I usually remove it entirely just to get it out of the way) and discovered all the ice in the bath had melted because I trapped the escaping heat within a thermally isolating environment. Good job physicist! Luckily I had plenty of ice in my freezer, but that meant when my wife came home she had no ice for her water and that wasn't cool. Ba-dump ppsssh! I was using the digital thermometer to monitor the temperature of the cooling wort, but unfortunately it doesn't have a descending alarm, only ascending, so I had to keep extra close attention and even though I thought I had, when the reading hit 68°F and I measured the temperature elsewhere in the wort it read into the high 50s, which wasn't what I wanted! I had to add some heat to the wort via the stove, and then chill it some more, and in the end got the desired 68°F wort into which I pitched the hydrated yeast.
Wort in fermenter, yeast pitched, blow-off tube placed: ready for brew bin.
I hope these mistakes don't affect the fermenting. They at least didn't appear to as the primary fermentation started after a few hours, made a mess I had to clean up, and did so again overnight. There are several reasons why this happened. One, I overfill my fermenter. Because I brew 1-gal batches I want to make sure I get as much beer out of them as possible. Also, since I've started measuring the specific gravity of my batches that's beer that I have to effectively throw away, so I want to have as much beer as possible at the start. This couples into the second reason: I didn't explicitly plan for an imperial stout, but as you'll see in the recipe below, the amount of base malts was somewhat high, so I must have extracted a lot of sugars in the mash. This would lead to a lot of vigorous yeast action, especially at the beginning. I lost some beer in the overflow and in the larger than usual amount of trub. The OG measurement definitely indicates that there is a lot of sugar in the wort. I've also been topping off my fermenter after racking, and now after SG measurements, and even though that probably leads to some diluted beer, I really want to have 10 bottles from a batch. These are my babies, and every drop is precious, but I don't want to have weak beer because I'm adding too much water to the fermenting beer, so I'll have to find a happy medium somewhere.
Early stages of primary fermentation. After cleaning up the first mess that night.
After cleaning up the second mess the next morning. Look at how much beer I lost, and how much spent yeast is stuck at the top of the fermenter.
I left the cleaned brew bin and fermenter for Thanksgiving weekend and when I came back found that there were no new messes to clean, thankfully. The fermenting beer had settled after the primary fermentation ended and it was a lovely dark color. I racked it and measured the SG a few days after that (yes, this post spans a week+) and the current value is 1.024. I tasted the sample in which I measured the SG and the flavor was smoky and had good body. The promise of a tasty, high gravity beer is coming to fruition! I'm going to let it sit at least until Dec 8 before bottling it. Being a dark heavy beer I plan to let this bottle condition for more than a few weeks and hope to have a lovely Imperial Stout to enjoy in 2013.
And now my cobbled together recipe:
Stout & About
Grain Bill:
2.5 lb Marris Otter Malt
0.25 lb Roasted Barley
0.25 lb Crystal 40L Malt
0.125 lb Munich Malt
0.125 lb Flaked Wheat
Strike 4.1 qt H2O at 163°F. Mash for 1 hour at 153°F. Sparge with 4 qt H2O at 170°F.
75-min Boil:
20 gm Willamette Hops 4.7 AA% @ 60 min
20 gm Fuggle Hops 4.8 AA% @ 60 min
Cool to 70°F in ice bath. Hydrated and pitch 1/2 packet Safbrew T-58 yeast. Bottle with 19 gm priming sugar.
Stop by in early 2013 for a bottle of my first stout and we'll see how it turned out. Check the updating gallery here for all pictures from this brew.
Until next time friends, happy brewing!
Update Jan 9, 2013:
I've since bottled, conditioned, and tasted this brew. I can say it's a stout! I didn't hit it out of the park with this batch but I'm proud of it and it's a good start for brewing a thrown together recipe. It has a nice smoky flavor and approaches the body of a stout but doesn't quite make it. The color could be darker, and the body heavier, but overall I like it. It's perfectly drinkable, but could use some improvement. The SG measurements have it at ABV 7.6%.
10 bottles of beer to condition, 10 bottles of beer!
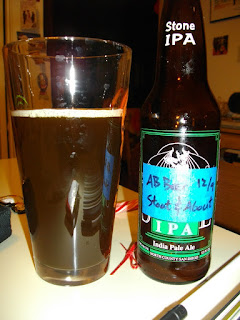
Solid stout. Good color and flavor


No comments:
Post a Comment