
Milled grain and hops ready to become beer!
Last week my wonderful wife said to me, "I'm going shopping this Saturday. Here's money to buy ingredients to brew a batch of beer so you can keep yourself busy while I'm out that afternoon. Happy Sweetest Day hunny!" My wife's the greatest :-D
So Saturday morning my neighbour Luis and I drove out to The Brew Mentor. He's been interested in homebrewing and since meeting me he's hung out with me during my brewing, has been slowly buying equipment, and was ready to buy ingredients for his first batch. When we walked into the store an employee approached us asking if we needed help. As I didn't have a recipe ready my neighbour took the proffered assistance. The employee, Larry, eagerly helped him find an all-grain Scottish Ale recipe, downsized it for a 1-gallon batch, weighed out and milled the grains, and gathered with him the rest of the equipment he needed to start homebrewing. I sat at a table in their wine tasting area putting together a grain bill and hops list for my brown ale batch and when Luis was done I went over to the malts to weigh out what I needed to complete my grain bill. From the 1-lb bags of grains I had been buying at Warehouse Beverage before I started patroning The Brew Mentor I have plenty of malted grains sitting double-bagged in my fridge. I had those with me hoping I could use some of them instead of buying all new grains. Of the 2.7-lbs of grain I used in this batch I only had to purchase 1.7 lbs at the store. One new thing I learned on this trip to The Brew Mentor is that Brown Malt, which I hoped to add to my grain bill, is not much different from Caramel/Crystal 60L except that Brown Malt has a Lovibond number of 65. Thanks for the tip, Larry! I completed my purchase and we headed back to Cleveland Heights. I was ready to brew.
In addition to buying the needed ingredients I also purchased an hydrometer. This is a device used in brewing and vinting to measure the density of the fermenting liquid. Before adding yeast to the wort or juice the liquid is full of sugars. As the yeast consume the sugars turning them into alcohol the density drops. When the density asymptotes to a final value the fermentation is over and a calculation based on the two measurements can reveal the alcohol content (ABV) of the final product. Depending on your hydrometer, the reading can be in specific gravity (SG) or Brix (often for vinting), calibrated to 60°F or 68°F.

Measuring the SG is important because my recent IPA turned out, in my fellow homebrewer's words, to be a "nice session beer, but with weak aroma." While it is a perfectly drinkable beer, it's not what I was trying to make and am disappointed with it. The only thing I can point to for why it turned out weak in strength and flavor is that I must have done something wrong in the mash. This step is most important in all-grain brewing because it's here where the fermentable sugars are converted from the starches via enzymes in the grains and extracted as a sugary, sticky liquid. Syrup and dry malt extract-based brewing has the advantage over all-grain brewing because the fermentable sugars are given to you ready to boil in water with added hops and spices. This makes homebrewing easier, but I enjoy the full action of brewing, from grain to bottle and down my gullet, so for now I'm sticking to all-grain brewing. And since I'm only brewing 1-gallon batches (nanobrewing!), the mash isn't a hassle like I've heard it can be with 5-gallon and greater homebrewing. However, my Cascade IPA-turned-session beer shows that I don't have that step completely mastered. Fortunately another all-grain homebrewing friend has come to the rescue.


Wort in test tube after original gravity (OG) reading before pitching yeast.
Why I didn't take a photo of the hydrometer in the wort in tube is beyond me.
Measuring the SG is important because my recent IPA turned out, in my fellow homebrewer's words, to be a "nice session beer, but with weak aroma." While it is a perfectly drinkable beer, it's not what I was trying to make and am disappointed with it. The only thing I can point to for why it turned out weak in strength and flavor is that I must have done something wrong in the mash. This step is most important in all-grain brewing because it's here where the fermentable sugars are converted from the starches via enzymes in the grains and extracted as a sugary, sticky liquid. Syrup and dry malt extract-based brewing has the advantage over all-grain brewing because the fermentable sugars are given to you ready to boil in water with added hops and spices. This makes homebrewing easier, but I enjoy the full action of brewing, from grain to bottle and down my gullet, so for now I'm sticking to all-grain brewing. And since I'm only brewing 1-gallon batches (nanobrewing!), the mash isn't a hassle like I've heard it can be with 5-gallon and greater homebrewing. However, my Cascade IPA-turned-session beer shows that I don't have that step completely mastered. Fortunately another all-grain homebrewing friend has come to the rescue.

Grains steeping in the mash bag.
Kati, my labmate and fellow graduate student homebrewer, has found a mash technique that's perfect for nanobrewing. She sets her oven to it's lowest setting, 170°F, and turns it off. After mixing the milled grains into the hot strike water she gives it a good stir, inserts the remote probe of her digital kitchen thermometer into the mash, covers the pot, and puts it in the oven, and she's reported to me that she has little heat loss during the hour mash! To let the physicist in me out to lecture on the science for a bit, it's because she's set up a uniformly warm environment around the mash so that the ΔT, the temperature difference between the mash pot and it's environment, is minimal. With the remote probe on the digital kitchen thermometer the mash temperature can be read without opening the oven and losing that stored heat. I attempted to do this but don't think I pulled it off perfectly. First, I don't have an electric oven with a digital control and display so setting it to a low enough temperature isn't easy. My oven is old and gas (but I prefer the gas to electric, anyway) and I'd like to get a simple in-oven thermometer to monitor the temperature in there. Second, I don't have a digital thermometer with remote probe so I had to open the oven every 10-15 minutes to check the mash temperature. Despite the swing up near 160°F and the need to add two cups of cold water, the mash stayed near 154°F. I tasted the first runnings after straining the mash and they were sticky and sweet. Despite not quite successfully implementing the new mash technique I think I nailed the mash and extracted all the fermentable sugars.

I then took the SG of the hot pre-boil wort. As mentioned above I wanted to start taking regular SG readings to have a log of the wort density throughout the brewing and fermenting process so I could better pinpoint where something went wrong if the final product isn't up to par. After adjusting for the 160°F temperature of the mash I had a pre-boil SG of 1.044.

After the dicey mash the boil was event-free. When coming to a boil I like to let the wort boil for 10-15 minutes before adding the first hops and starting the 60-minute timer. Since boiling the wort is to sanitize it, killing anything that might be in it, as well as concentrating the sugars and coagulating the proteins from the grains, I feel this just does that more so, as well as boiling away more of the wort so I don't throw away a lot of what won't fit into the 1-gallon fermenter. I added in three different types of hops during the boil for bittering, flavor, and aroma, respectively.

The wort chilled from boil to 70°F in an ice batch in about 30 minutes and went into the fermenter with half a packet of dry Safale-04 brewer's yeast. Before pitching the yeast I took another SG reading and got 1.057, perfect! I pitched the yeast about 5PM and by bedtime it was furiously fermenting. Now it's been three days of active primary fermentation and it's settled down so I replaced the blow-off tube with the airlock. I feel good about this batch and hope it turns out good.

Here's the recipe I made up from two different brown ale recipes in Brooklyn BeerShop's Beer Making Book and Beer Craft's basic brown ale recipe.
Brown Jewels Ale
Grain Bill:
2.0 lb Marris Otter Malt
0.3 lb Caramel/Crystal 60L Malt
0.2 lb Biscuit Malt
0.1 lb Rye
0.1 lb Chocolate Malt
Strike 3-3/8 qt H2O at 163°F. Mash for 1 hour at 153°F. Sparge with 5 qt H2O at 170°F.
60-min Boil:
5 gm Simcoe hops @ 60 min
5 gm US Northern Brewer hops @ 40 min
5 gm US Goldings hops @ 55 min
Cool to 70°F in ice bath. Pitch 1/2 packet Safale-04 yeast dry. Bottle with 25 gm priming sugar.
Stop by around Thanksgiving and I'll give or trade you a bottle and we'll see how it turned out. Check out my updating gallery from this batch.
Until next time friends, happy brewing!
Update Jan 9, 2013:
Since writing this post back in October I've bottled, conditioned, tasted, and nearly finished off this batch of brown ale. It was a success! The ale has a crisp, clean flavor and body any experienced beer drinker would recognize as a good brown. The color is darker than what I think a brown should be, but this is no detriment to the batch. The SG measurement have the ABV at 5.5%, not too shabby for a brown ale. I'll definitely brew this recipe again.


First runnings up top, grains in bag in sparge steep below.
I then took the SG of the hot pre-boil wort. As mentioned above I wanted to start taking regular SG readings to have a log of the wort density throughout the brewing and fermenting process so I could better pinpoint where something went wrong if the final product isn't up to par. After adjusting for the 160°F temperature of the mash I had a pre-boil SG of 1.044.

Boiling wort! Look at that heat break.
After the dicey mash the boil was event-free. When coming to a boil I like to let the wort boil for 10-15 minutes before adding the first hops and starting the 60-minute timer. Since boiling the wort is to sanitize it, killing anything that might be in it, as well as concentrating the sugars and coagulating the proteins from the grains, I feel this just does that more so, as well as boiling away more of the wort so I don't throw away a lot of what won't fit into the 1-gallon fermenter. I added in three different types of hops during the boil for bittering, flavor, and aroma, respectively.

Pouring the chilled wort, ready to pitch the yeast.
The wort chilled from boil to 70°F in an ice batch in about 30 minutes and went into the fermenter with half a packet of dry Safale-04 brewer's yeast. Before pitching the yeast I took another SG reading and got 1.057, perfect! I pitched the yeast about 5PM and by bedtime it was furiously fermenting. Now it's been three days of active primary fermentation and it's settled down so I replaced the blow-off tube with the airlock. I feel good about this batch and hope it turns out good.

Active yeast chompin' up sugars.
Here's the recipe I made up from two different brown ale recipes in Brooklyn BeerShop's Beer Making Book and Beer Craft's basic brown ale recipe.
Brown Jewels Ale
Grain Bill:
2.0 lb Marris Otter Malt
0.3 lb Caramel/Crystal 60L Malt
0.2 lb Biscuit Malt
0.1 lb Rye
0.1 lb Chocolate Malt
Strike 3-3/8 qt H2O at 163°F. Mash for 1 hour at 153°F. Sparge with 5 qt H2O at 170°F.
60-min Boil:
5 gm Simcoe hops @ 60 min
5 gm US Northern Brewer hops @ 40 min
5 gm US Goldings hops @ 55 min
Cool to 70°F in ice bath. Pitch 1/2 packet Safale-04 yeast dry. Bottle with 25 gm priming sugar.
Until next time friends, happy brewing!
Update Jan 9, 2013:
Since writing this post back in October I've bottled, conditioned, tasted, and nearly finished off this batch of brown ale. It was a success! The ale has a crisp, clean flavor and body any experienced beer drinker would recognize as a good brown. The color is darker than what I think a brown should be, but this is no detriment to the batch. The SG measurement have the ABV at 5.5%, not too shabby for a brown ale. I'll definitely brew this recipe again.

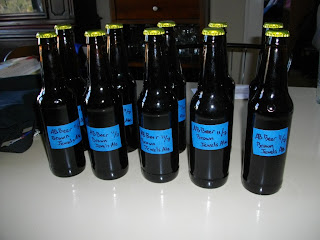
10 bottles, comin' right up!

Gotta have the right glass for the right beer.
No comments:
Post a Comment